Getting Started with Loqate

If you're just starting with Loqate, you can use this page to orient yourself and get started with your integration. We'll take you through five quick steps to get up and running, including making your first calls to the Loqate APIs, then provide some further reading at the end.

1. Create a Loqate account

If you haven't already, sign up for a Loqate account.

Signing up for a new account gives you a 14 day free trial, which gives you the opportunity to test your integration, experiment with our range of products, and experience the practical benefits they can bring to your organisation.

2. Choose an integration method

You can integrate with Loqate in various ways, from auto-generated code snippets to full API integrations. The option you choose will be determined by the nature of your business and what you want to achieve.

For the purposes of this article, and for the sake of simplicity, we're going to assume you'll at least partially be using an API integration, but see our Ways to Integrate page for more information about all of the options. 

Not a developer?
Not a developer?

We have a no-code option for Address Capture, Email Validation and Phone Validation, which we refer to as a Tag setup. See our Ways to Integrate page for more details, or our Quick Setup Guide to get started.

3. Create an API key

All Loqate services require an API key for authentication purposes, so you'll need to create one before you can start making any API calls. 

You can set up generic API keys or service-specific keys, and then apply various limits and restrictions to each, but to begin with we recommend creating a generic API key for the purposes of initial testing and setup.

To do this, click on the Add Service + button at the top of the screen in your Account:

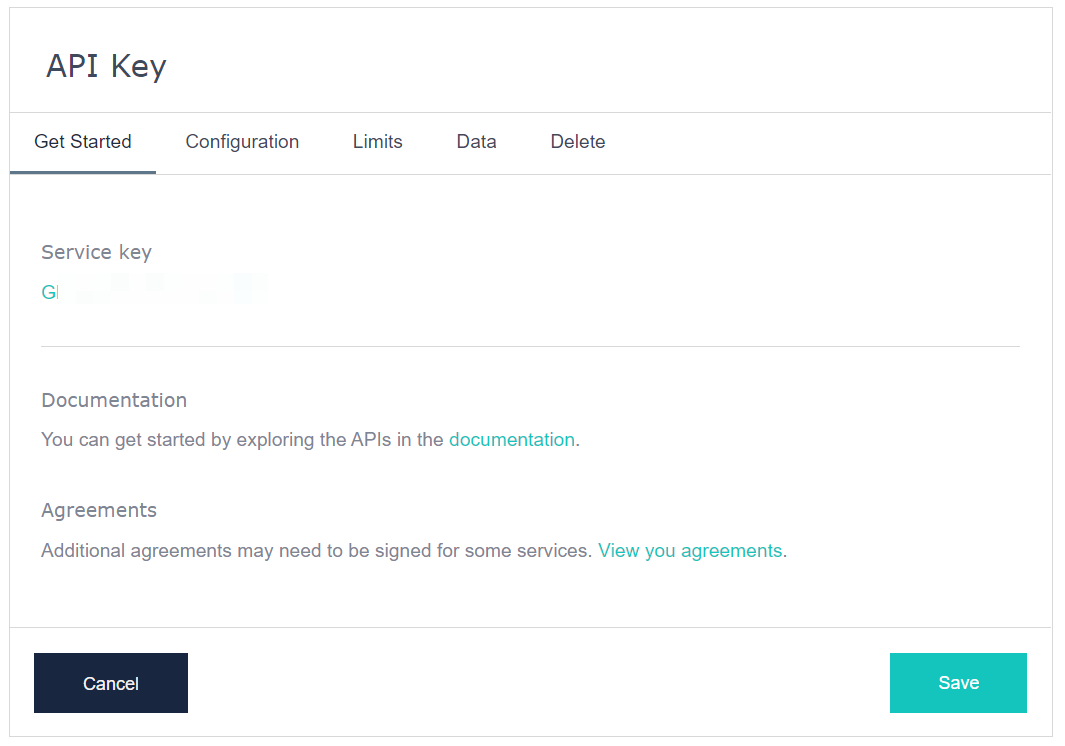
From the next screen select the API Key option, then you'll see your newly-created key. Take note of the key (which we've blurred out in the image below for security purposes), but for the time being you don't need to worry about any of the other options.

See our Creating API Keys page for full details of creating API keys and the various available options. 

4. Make some API calls

If you've chosen a Tag setup (see the Ways to Integrate page for more details about this), you can go ahead and test the form(s) on your website to see how Address, Email and/or Phone Validation works.

If you're going to be using APIs, the next step is to make some test calls using your new API key.

Here are some simple examples, which you can run in Postman or in a browser. Make sure you swap the placeholder API key (AA11-AA11-AA11-AA11) in each for your own API key.

Capture Find

A Find call uses a text search to find addresses and places - this returns an address ID which can then be used in a Retrieve call. This example is looking for addresses containing 'GBG' and the postcode 'WR5 3DA':

https://api.addressy.com/Capture/Interactive/Find/v1.10/json3.ws?Key=AA11-AA11-AA11-AA11&Text=GBG wr53da


Here's what that call should return:

{
    "Items": [
        {    
            "Id": "GB|RM|B|55943629",
            "Type": "Address",
            "Text": "G B G, Waterside, Basin Road",
            "Highlight": "0-5;11-14,15-18",
            "Description": "Worcester, WR5 3DA"   }
    ]
}


Make note of the "Id", which you'll use in the following Retrieve call.


Capture Retrieve

Once you've completed a Find call and have the outputted address ID, you can use that in a Return call to get the details of that address. Here's an example using the address ID generated in the previous call:

https://api.addressy.com/Capture/Interactive/Retrieve/v1.2/json3.ws? Key=AA11-AA11-AA11-AA11&Id=GB|RM|B|26772356


Here's what that call should return:

{
    "Items": [
        {    
            "Id": "GB|RM|B|55943629",
            "DomesticId": "55943629",
            "Language": "ENG",
            "LanguageAlternatives": "ENG",
            "Department": "",
            "Company": "G B G",
            "SubBuilding": "",
            "BuildingNumber": "",
            "BuildingName": "Waterside",
            "SecondaryStreet": "",
            "Street": "Basin Road",
            "Block": "",
            "Neighbourhood": "",
            "District": "",
            "City": "Worcester",
            "Line1": "Waterside",
            "Line2": "Basin Road",
            "Line3": "",
            "Line4": "",
            "Line5": "",
            "AdminAreaName": "Worcestershire",
            "AdminAreaCode": "",
            "Province": "Worcestershire",
            "ProvinceName": "Worcestershire",
            "ProvinceCode": "",
            "PostalCode": "WR5 3DA",
            "CountryName": "United Kingdom",
            "CountryIso2": "GB",
            "CountryIso3": "GBR",
            "CountryIsoNumber": "826",
            "SortingNumber1": "94142",
            "SortingNumber2": "",
            "Barcode": "(WR53DA1W4)",
            "POBoxNumber": "",
            "Label": "G B G\nWaterside\nBasin Road\nWORCESTER\nWR5 3DA\nUNITED KINGDOM",
            "Type": "Commercial",
            "DataLevel": "Premise",
            "Field1": "",
            "Field2": "",
            "Field3": "",
            "Field4": "",
            "Field5": "",
            "Field6": "",
            "Field7": "",
            "Field8": "",
            "Field9": "",
            "Field10": "",
            "Field11": "",
            "Field12": "",
            "Field13": "",
            "Field14": "",
            "Field15": "",
            "Field16": "",
            "Field17": "",
            "Field18": "",
            "Field19": "",
            "Field20": ""  
        }
    ]
}


Verify

A Find call uses a text search to find addresses and places - this returns an address ID which can then be used in a Retrieve call. This example is looking for addresses containing 'GBG' and the postcode 'WR5 3DA':

POST https://api.addressy.com/Cleansing/International/Batch/v1.00/json4.ws  
{
    "Key": "AA11-AA11-AA11-AA11",
    "Addresses": [
        {         
            "Address": "999 Baker Way 94404 San Mateo CA USA"
        }
    ]
}


And here's what that call should return:

[
    {
        "Input": {
            "Address": "999 Baker Way 94404 San Mateo CA USA"
        },
        "Matches": [
            {
                "AQI": "A",
                "AVC": "V44-I44-P7-100",
                "Address": "999 Baker Way,San Mateo CA 94404-1578",
                "Address1": "999 Baker Way",
                "Address2": "San Mateo CA 94404-1578",
                "AdministrativeArea": "CA",
                "Country": "US",
                "CountryName": "United States",
                "DeliveryAddress": "999 Baker Way",
                "DeliveryAddress1": "999 Baker Way",
                "HyphenClass": "C",
                "ISO3166-2": "US",
                "ISO3166-3": "USA",
                "ISO3166-N": "840",
                "Locality": "San Mateo",
                "MatchRuleLabel": "Rlh",
                "PostalCode": "94404-1578",
                "PostalCodePrimary": "94404",
                "PostalCodeSecondary": "1578",
                "Premise": "999",
                "PremiseNumber": "999",
                "Sequence": "1",
                "SubAdministrativeArea": "San Mateo",
                "Thoroughfare": "Baker Way"
            }
        ]
    }
]


Email Validation

Here's a sample call for a single-email validation request:

https://api.addressy.com/EmailValidation/Interactive/Validate/v2.00/json3.ws?Key=AA11-AA11-AA11-AA11&Email=info@google.com&Timeout=5000


Here's what that call should return:

{
    "Items": [
        {
            "ResponseCode": "Valid_CatchAll",
            "ResponseMessage": "Mail is routable to the domain but account could not be validated",
            "EmailAddress": "info@google.com",
            "UserAccount": "info",
            "Domain": "google.com",
            "IsDisposableOrTemporary": false,
            "IsComplainerOrFraudRisk": false,
            "Duration": 0.241169119
        }
    ]
}


Phone Validation

Here's a sample call for a phone validation request (we've included an example number of 01234 567890, so replace this with a real number you want to validate):

https://api.addressy.com/PhoneNumberValidation/Interactive/Validate/v2.20/json3.ws?Key=AA11-AA11-AA11-AA11&Phone=+441234567890&Country=GB&Iso3Country=True&AdditionalFields=True


Here's what that call should return:

{
    "Items": [
        {
            "PhoneNumber": "+441234567890",
            "RequestProcessed": true,
            "IsValid": "Yes",
            "NetworkCode": "",
            "NetworkName": "Net Solutions Europe Limited",
            "NetworkCountry": "GBR",
            "NationalFormat": "01234 567890",
            "CountryPrefix": 44,
            "NumberType": "Landline"
        }
    ]
}


5. Check your usage

Once you've made a few API calls, head over to the Reporting page in your account. Here you'll be able to see usage summaries per key (or across your account as a whole), showing both charged and free requests and, if appropriate, the total cost of them so far. For example:

We recommend you regularly check the usage on your keys, to maintain visibility of how your services are being used. 

For full details of these reports, see our Monitoring Account Usage page.

Other important considerations

Once you've set up and tested an API key, you can go ahead and put together your full integration. Some further considerations to take into account include:

  • What all the available service options are: there are lots of Loqate services available, so read through this page to see what you might find useful.
  • How to stay secure: we provide a range of features to help you ensure that your integration is as secure as possible. See this page for full details.

Further reading